Sunday afternoons.
They're nice because they mark the end of a tough week. They're not so nice because, well, they also mark the beginning of another...
It is because of this predicament that I like to make the most of my Sundays. The next one is a whole 7 days away. Gah. Things are picking up at school and there's so much to do all of a sudden. This time of the year is painful but it makes the summer break, following shortly after, so much more worth the wait.
I'll be in the south of France this summer- Provence. The french food markets are something I can't wait to see again. When I was living in Paris, on Sunday, too, we used to walk to the markets and fetch a freshly-baked baguette, a wide variety of fresh cheeses, olives, fruit, and maybe a sweet pastry from one of adorable bakeries in the area, for breakfast. The produce was something to admire. We definitely ate well....
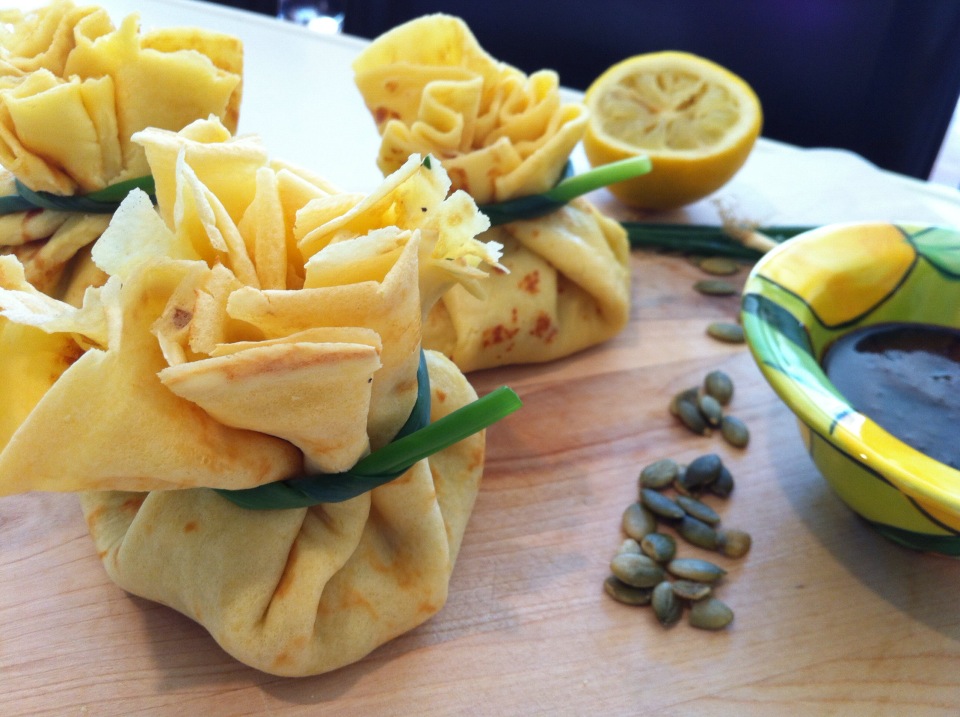
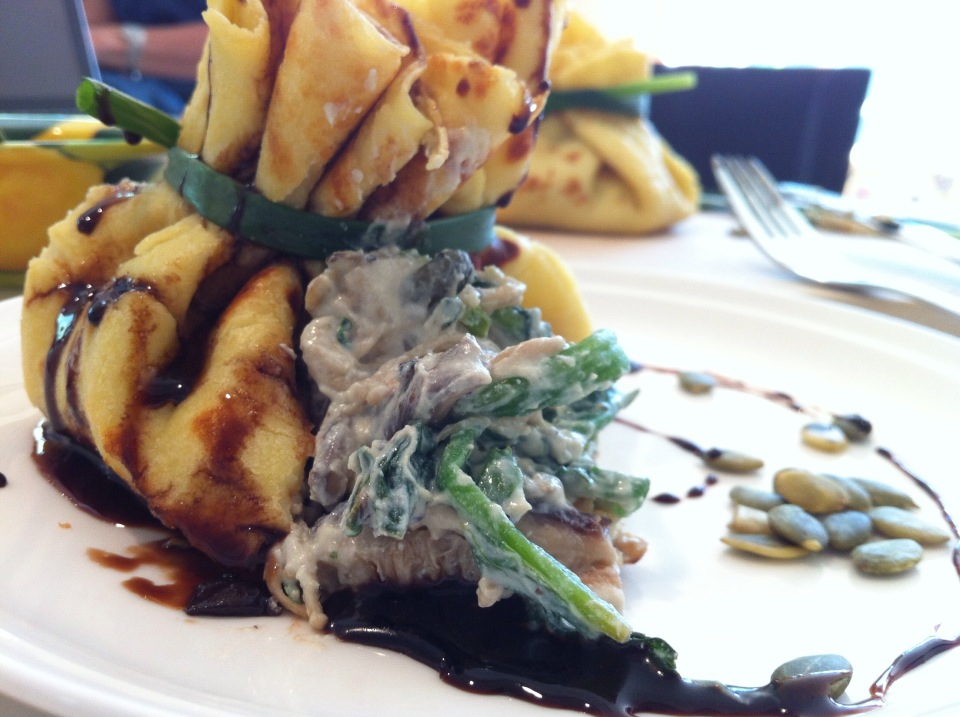
I felt like something comforting to eat for lunch today. In the end I made lunch for the whole family, while keeping them waiting a little, which ALWAYS seems to happen, no matter how early I start. At least they're hungry by the time I'm done- everything tastes better when you're hungry and you also tend to eat a lot more! ;)
Spinach, mushroom and ricotta cheese is a common ingredient combination (a great one at that). However, alongside the soft crepe- some crunch was needed, and a slight zing as well, just to cut through the rich filling. So, I added pumpkin seeds to the mix and drizzled a sharp balsamic reduction over the top of the final plated dish. Overall, it was a pretty tasty dish. I would however, add a dash of nutmeg to the mixture, and pine-nuts would be a nice substitute for the pumpkin seeds- they both work really well though.
NUTRITION:
Ricotta cheese is actually lower in fat than cottage cheese and is hands down a better choice over hard cheeses which tend to have higher fat contents. But, don't exclude hard cheeses from your diet because a variety of cheese is still key to healthy eating. It provides protein, heart-healthy omega 3's, and a significant dose of calcium which is important for strong bones.
Mushrooms and spinach are very low in calories per serving and offer a wide range of nutritional benefits. All vegetables are key to healthy eating, in moderation that is.
The crepes are understandably something you'd want to avoid eating on a daily basis, and their nutritional content isn't very high. But, they're great for a change now and the. If you're looking to make them healthier, you can substitute the plain flour for rye, buckwheat or wholemeal (many others) which offer more health benefits than plain flour does.
Ingredients:
Filling:
2 spring onions, chopped + long end pieces
1 garlic clove, crushed
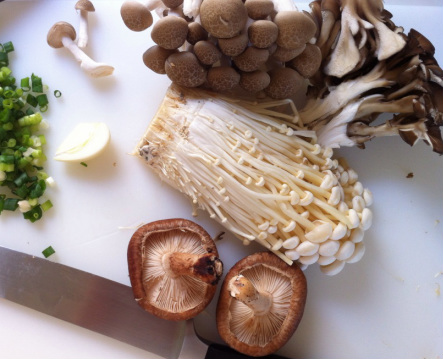
1 pack mixed mushrooms, cut into pieces (refer to picture below)
Bunch of parsley, chopped
200g fresh spinach, leaves broken in half
210g ricotta cheese
50g pumpkin seeds
30g fresh cream
Olive Oil
Salt & Pepper
1 lemon
Crepes:
175g plain flour
1/2 tsp fine salt
250ml whole milk, and extra if needed
4 eggs
50g butter + extra for cooking
Balsamic Reduction:
1/4 cup balsamic vinegar
1 tsp honey
2 tsp brown sugar
In a medium bowl, add the flour and salt, and mix. Melt the butter gently in the microwave and let cool. In a separate bowl, whisk the eggs and milk. Make a well in the center of the flour mixture and gradually whisk in the egg mixture until all is combined and smooth. Then, add the butter and whisk again until smooth.
In a pan, place a small knob of butter and let it coat the bottom of the pan. If there is too much, wipe the pan with some paper towel. Place a ladle full of batter in the pan, lift and turn the pan so that the batter works it's way over the entire pan bottom, and a little up the sides. (This helps with flipping). Cook for about two minutes or until browning slightly on the side that's face down. Then flip and let the other side brown slightly too. Flip onto a plate and repeat until all the batter is used up. Set the crepes aside for later.
∆∆∆∆∆∆∆∆∆∆∆∆
In a large pan, drizzle in 1-2 tbsp of olive oil and place on medium heat. Once warm, chuck in the spring onion and garlic and saute until soft. Then, add the mushrooms, and grind in some pepper and salt until well seasoned to taste. Cook through until soft, but still meaty, then add the parsley and mix. Take off the heat and transfer to a medium bowl. Set aside.
∆∆∆∆∆∆∆∆∆∆∆
In the same pan, drizzle some olive oil and chuck in your spinach. Stir to coat. Squeeze over some lemon juice. Add a splash of boiling water and cover for a minute or two until the spinach is wilted and has kept its colour. Any stalks should be soft with a little crunch still. Add a touch of salt and pepper.
Add the spinach, ricotta, cream and pumpkin seeds to the bowl of mushrooms and mix well. Add more lemon juice, salt and pepper until suited to your taste. Set aside.
∆∆∆∆∆∆∆∆∆∆∆
In the same pan, place the balsamic vinegar, sugar and honey. Turn the heat up to medium and stir constantly. Let it cook until it bubbles and has slightly thickened, whilst stirring. Then, take off the heat and transfer to a small bowl.
ASSEMBLING:
Roll:
I admit that it gets a little fiddly making the parcels, so by all means, make it easier by simply filling your crepe and rolling it up in the traditional way. It still tastes the same. :p
Parcel:
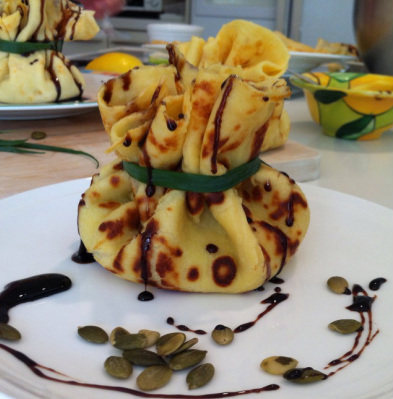
If you want it warm, heat your mixture in the microwave for a few seconds depending on how warm it still is, then assemble. Reheating the crepes makes them floppy.
Place a crepe on a flat surface and put about two heaped spoonfuls of the filling in the middle. Fold in the outside to create a parcel and tie the long ends of the spring onions around it to hold it together. Drizzle over the balsamic reduction and eat.
ENJOY
Caera here!
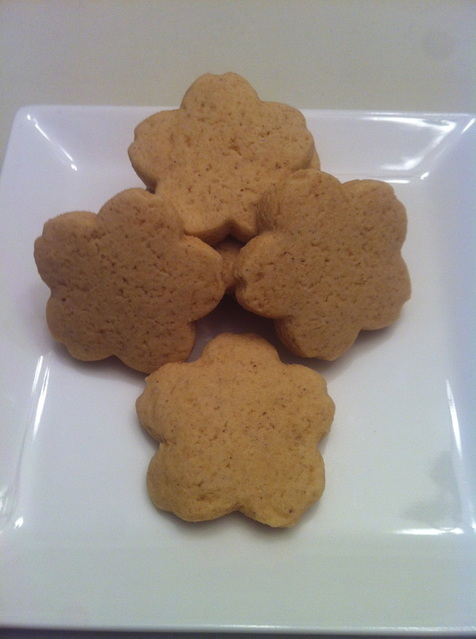
Sugar and spice and all things nice- I cannot seem to steer away from spices when I bake!
I have to say that ginger is one of my favourite root vegetables. Not only does is serve a great purpose in asiatic dishes, but as a ground spice it is just as significant in baking. It's very common to see ground ginger paired with spices such as allspice, nutmeg, and cinnamon, and the only reason for that is because they are a match made in heaven...at least in my opinion. Spice adds such a comfort and warmth to food- this is especially so for baking. The combination of these spices, which many would typically relate to christmas celebration biscuit we know as gingerbread, balances out the sweetness of muffins, cakes and cupcakes to provide an awesome edge in flavour. Ginger, especially, gives a slight heat to anything it's cooked with- and this just makes eating food that much more enjoyable. I developed this recipe from the fundamentals of the various other recipes I'd read about, so in the end I'd taken a bit of a risk with this one. They may not have risen, the baking ratios may have been off - too sweet, too spicy, or not enough of either- and the change of ingredients may have meddled with the cooking temperature and time. This is what you have to face if you attempt to freestyle anything. Some baking requires such precise measurements and cooking settings that its simply not worth messing around with the recipe. BUT, this is also how new ideas and flavour combinations are discovered- so if you can take the consequences of a few disasters in the kitchen along the way, then by all means, go solo. :)
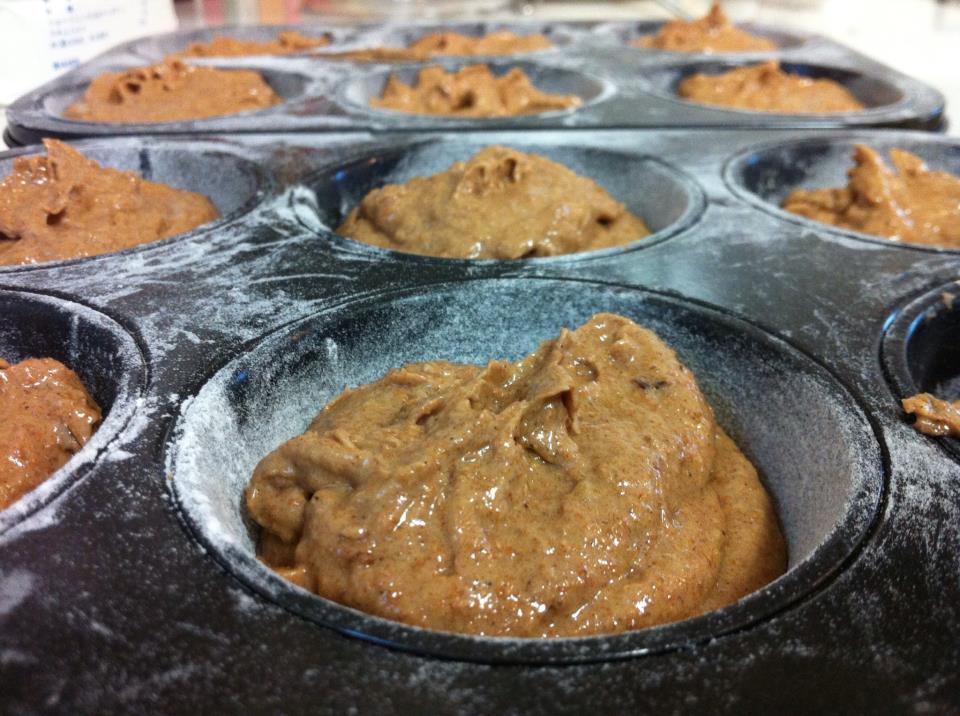
I couldn't be happier with the result. I opted for greasing and flouring the muffin holes rather than lining because I was looking for that crust on the outside that gives you a subtle crunch, whilst the center remains meaty. They also rose nicely, and the second lot I cooked were much larger. My ideal muffin has to be big, have that splitting effect on the surface, have a crunchy outside, a meaty, moist center and it cannot be too sweet. These did pretty well according to the criteria. :)
DRIED DATES. GAH. My love for this dried fruit! They're like capsules of solidified, healthy, golden syrup. I cook my oatmeal in the morning with chopped dates because they add so much syrupy sweetness that it amazes me they're still healthy. Plus the flavour of their sweetness beats refined sugar hands down. I snack on them with cheese because they're just as good as quince paste! They're also an amazing addition to trail mixes.
If you're looking for an energy boost, I'd recommend nibbling on a few of these. They're high in natural sugars like glucose, sucrose and fructose.Their high fiber content aids digestion too. Thumbs UP.
| Ingredients:
- 115 g dried dates
- 2 tbsp golden syrup
- 1 1/4 cup brown sugar
- 250 g butter
- 1 tbsp vanilla extract
- 1/4 tsp salt
- 4 eggs
- 2 tbsp allspice
- 2 tbsp cinnamon
- 2 tsp ground ginger
- 1/2 cup milk
- 100g wheat bran
- 175 g plain flour
- 2 tsp baking powder
| Method:
- Preheat your oven to 180˚C Fan or 200˚C. Grease the muffin pan with butter and then coat with a sprinkle of flour. The easiest way to do this is to sprinkle some flour into each hole and over a sink, turn and tap the tin until the flour has coated every spot. You can also switch to more common methods and line the holes with baking cases...
- Place the dates in a bowl and cover in boiling water. Let them sit for 5 minutes and then drain them of the water. This process intensifies the sweetness and flavour of the dates.
- In a medium bowl, place the dates, golden syrup, brown sugar, butter, vanilla extract and salt. Beat until light and fluffy.
- Add the eggs and spices and beat until well combined; about a minute. Mix the baking powder, bran and plain flour in a bowl, and have the milk ready in another. Then, gradually add the flour mixture and milk spoonfuls at a time, switching back and forth from each ingredient, and beating between additions until all is combined.
- Place the mixture in the prepared muffin tin, about 3/4 of the way full. Place in preheated oven and bake for 20-25 minutes, or until golden brown. Press the tops gently with a finger, and if the muffin springs back, they should be done.
- Leave to cool and then dust with icing sugar before devouring. |
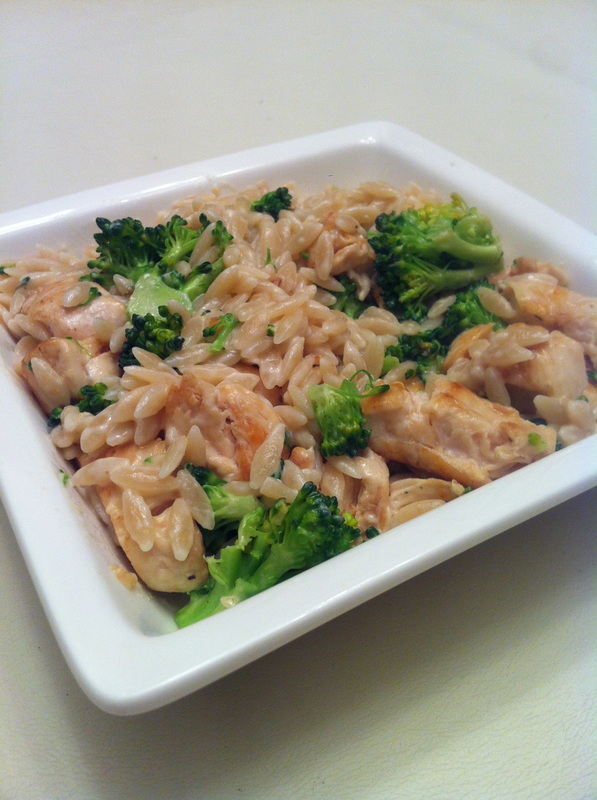
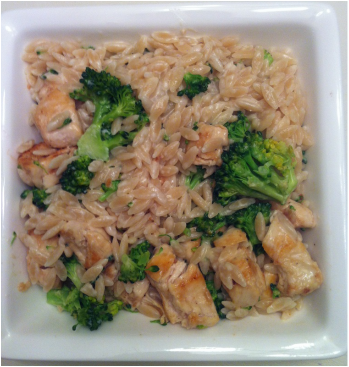
My brother and I were home alone for dinner tonight so I decided to make him a really yummy dinner. At first, I had no idea what to make him, but then I remembered a really delicious pasta dish I had a while back--Orzo with chicken, broccoli and cheese. I was so happy when Grant (my brother) gave me a low 9 out of 10 on the delicious scale! I am slowly moving towards a solid 10 out of 10 (: One of these days I guess I will have to make him a three course meal or something to achieve perfection.
This meal did not take long to prepare either, which was really nice. I was able to make it in less than 30 minutes and keep the kitchen organized at the same time! Woo! I had never made a cream sauce before so I really didn't know what to do when that stage of the meal came around. However, it is way easier than it sounds! All you have to do is combine around 1-2 tablespoons of cream ( I used whipping cream) with 2 tablespoons of regular milk over low heat and stir it constantly to make sure it doesn't burn. After the milk heats up, then you can add a cheese of your choice to make the sauce thicker and more savory. I chose parmesan because Grant always puts it on his pasta. Once the cheese is melted, then all you have to do is throw your cooked pasta, chicken, vegetables and whatever else you want to add in into the saucepan and stir it around until everything fully combined. See, its not that hard!
Check out the recipe below! Ingredients:- 2/3 cup orzo pasta
- 2 boneless, skinless chicken strips (thawed), and sliced into bite size pieces
- 1 1/2 tablespoon olive oil
- Garlic salt or seasoning of your choice for the chicken
- 1/2 cup broccoli, chopped
- 1-2 tablespoons cream
- 2 tablespoons milk
- 1/4 cup shredded parmesan cheese
- Salt and pepper to taste
| Directions:- In a small pot, boil around 2 cups of water.
- In a sauce pan, add 1 tablespoon olive oil and wait until it heats up
- When the oil is heated, add the cut up chicken, salt, pepper and garlic salt
- When the water comes to a boil, add the orzo and cook for 8 minutes.
- While the chicken and pasta are cooking, chop broccoli until you have around a 1/2 cup. Around 4-5 broccoli trees
- Once the chicken is done, take it off heat and place it on a plate. You will be adding it to the pasta and broccoli in a few minutes.
- In the same pan that you cooked the chicken in, add a 1/2 tablespoon olive oil and the cut up broccoli and saute for 2-4 minutes, or until golden around edges. Set aside on the same plate as the chicken.
- After the pasta is done cooking, strain it and set aside.
- In a sauce pan, combine the cream, milk and parmesan cheese. When the cheese melts, add the orzo, chicken and broccoli and stir for 1-2 minutes or until the dish is fully combined.
- Dish up and dig in (:
|
 TGIF! To kick off my weekend I thought I should do a little baking. I was really in the mood to make some type of snack food that I could munch on and not get too full from. So I came upon the idea of making crackers! I found this recipe on Pinterest a while ago and have been wanting to try it ever since! 'Gluten Free On A Shoestring' created the original recipe for vanilla animal crackers, but I changed it up a little, based on what ingredients I had in the pantry.
These crackers aren't salty crackers you would have with cheese or sweet crackers you would have as a dessert; these crackers are in the middle. Their flavor is a tad sweet because the recipe calls for sugar, but the sweetness is not very noticeable. I would suggest experimenting with different flavors like peanut butter, chocolate chips, banans, or oats to give the crackers a different flavor and texture. If you dont want to make these crackers gluten free, you can use regular flour instead of gluten free flour--its the same ratio (1:1) (: Ingredients:- 1 1/2 cup all purpose GF flour
- 3/4 teaspoon xanthan gum
- 1/2 teaspoon baking powder
- 1/8 teaspoon (a dash) baking soda
- 3 tablespoons almond milk (unsweetened)
- 1/8 teaspoon (a dash) salt
- 1/4 cup brown sugar
- 1/4 cup granulated sugar
- 3 tablespoons butter
- 1 egg ( I used an egg replacer: 1 tsp egg replacer with 2 tablespoons water)
- 1 teaspoon vanilla
Directions:- In a mixing bowl, combine all ingredients and mix until a dough is created
- On a sheet of baking paper (parchment paper) place the dough in the center and add another sheet of baking paper on top.
- Roll out the dough until it is 1/4 inch thick and place it in the freezer for 15 minutes
- Preheat oven to 350F
- After 15 minutes, take dough out of the freezer. Using a cookie cutter, cut out shapes for the crackers and place on a lined baking sheet.
- Bake in oven for 10 minutes or until golden brown around the edges.
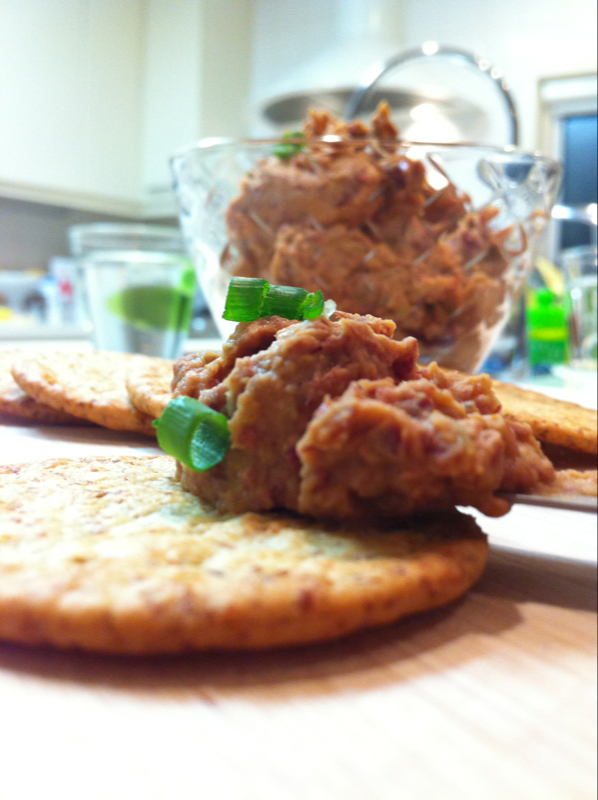
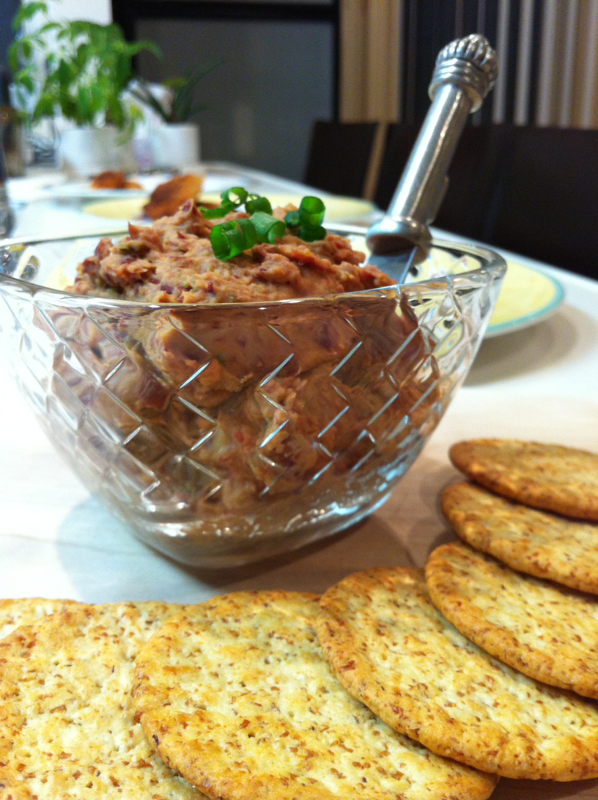
Dinner time! It was basically ready by the time I got home, which I was almost upset about because it meant no necessary time in the kitchen. This was until I found a quick and easy red kidney bean dip. With a few alterations, I made a small batch to have alongside a pumpkin feta and baby spinach quinoa salad with pan fried white fish.
The curry and lemon that shine through in flavour accompanies fish very well, I discovered. So, I actually ate it as a condiment with my fish, like you would with tartare sauce. The whole meal was a massive assembly of awesome flavours...
This dip recipe, though, is simply a keeper. It's healthy, vegetarian and filling. The flavours marry so well together! It's one of those dips where you can't help but um and ah at the taste. Everything in it is 100% beneficial for your health. Kidney beans are high in fiber which aids with digestion and keeps your food moving smoothly through you system. They're also a good protein source. Protein is needed for muscle growth and is relied on to help transport oxygen-rich blood throughout your body. Protein also keeps you feeling full for longer, so it's a great food source if you're watching your weight. Spicy food provides you with a source of desease-fighting antioxidants, vitamins and minerals, more so than many fruits and vegetables. And spices make everything taste great! This is really good for a mid-meal snack. I made a small batch, which is about half a bowl full. It's totally worth doubling :) I've adapted this recipe from Dinner With Julie, and I will be making this as often as I can. I can't get over the taste... Ingredients: 1 tbsp olive oil -for cooking 2 spring onions, chopped 1 large garlic clove, crushed 1/2 teaspoon salt 1/2 tbsp curry paste 1 tbsp tomato sauce (ketchup) 1/4 tsp garam masala 200g kidney beans, rinsed and drained of water 1 tbsp lemon juice 1/2 tsp honey Method: In a pan, drizzle the olive oil and warm on medium heat. Add the spring onion and garlic and saute until soft. You can turn onto lower heat if you feel that your garlic and onion will cook too quickly. When soft, add the salt, curry paste, tomato sauce and garam masala. Cook until it's nicely fragrant, then take it off the heat. In a food processor, place your kidney beans, honey, lemon juice and onion mixture. Blend until you get a consistency you like. Chunky or smooth, they both work well. Taste and add any extra lemon juice, salt or pepper, if you think it needs. Enjoy with some crackers, toasted flat-bread, as a spread on a sandwich, with slices of raw vegetables or simply ON ITS OWN! Yummy.
Saturday afternoon well spent. Except, the turn out wasn't as clean-cut as I would've liked.... literally.
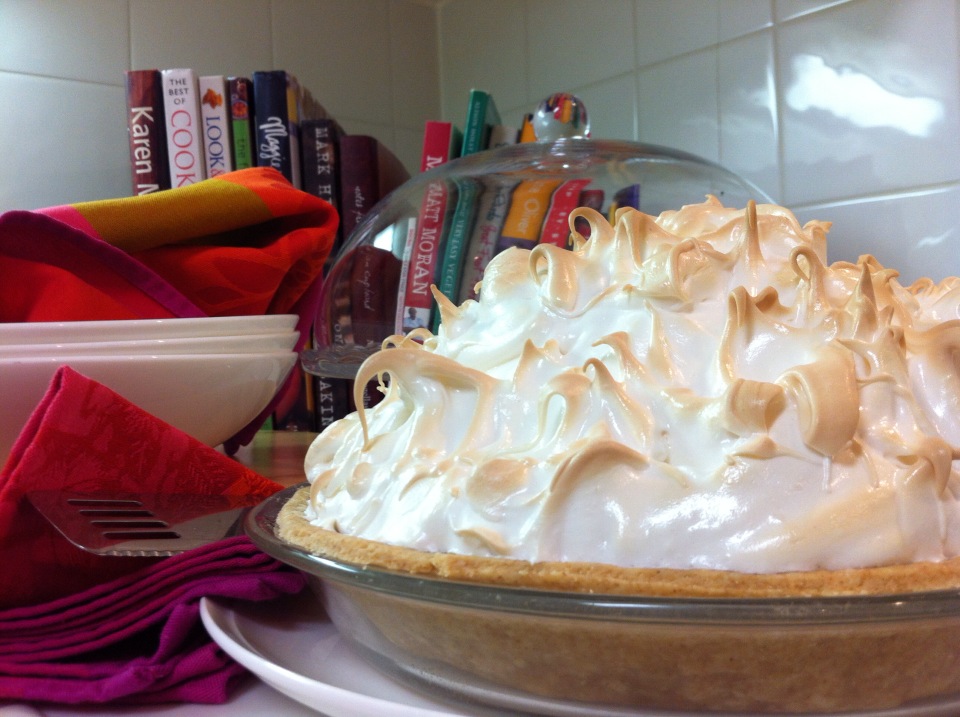
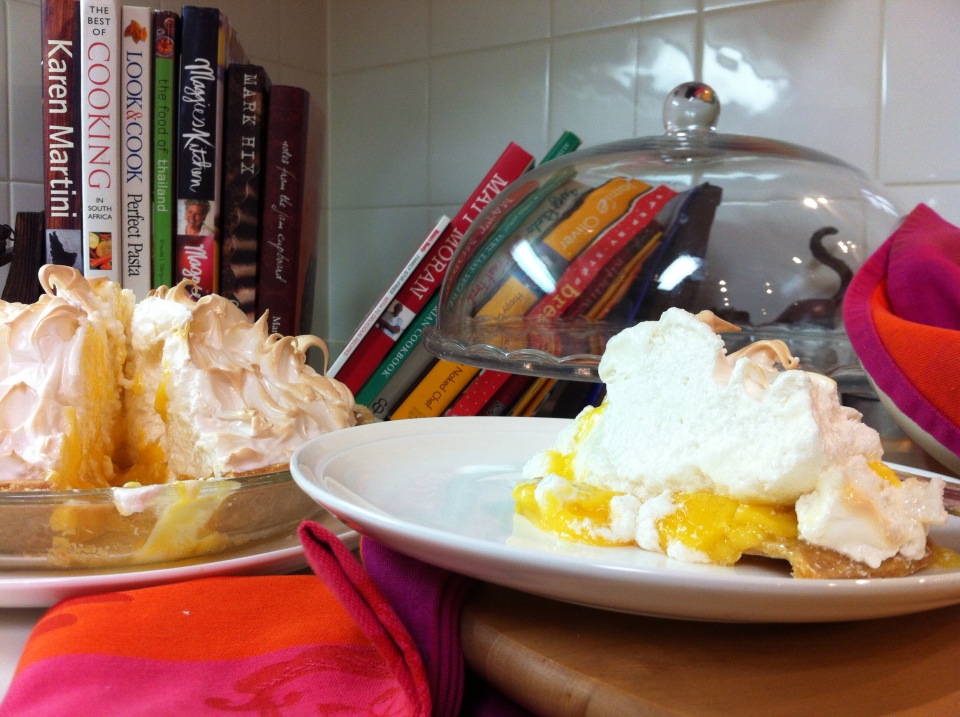
Don't get me wrong, I love lemons and lemon curd, and lemon everything. I have nothing against lemons. But, you have to tweak a few traditional things now and then- simply for the fun of a change! So, in this recipe, I substituted grapefruit in for the lemons in a traditional meringue pie. This is actually a half-truth, because I did eventually add lemon juice. The reason behind that decision is that the grapefruit wasn't quite sharp enough to cut through the sweetness as much as lemon manages to do so nicely. The result, though, was surprising, as you get a kick of sharp lemon, but then a taste of the fragrant grapefruit lingering behind it. It's an interesting twist.
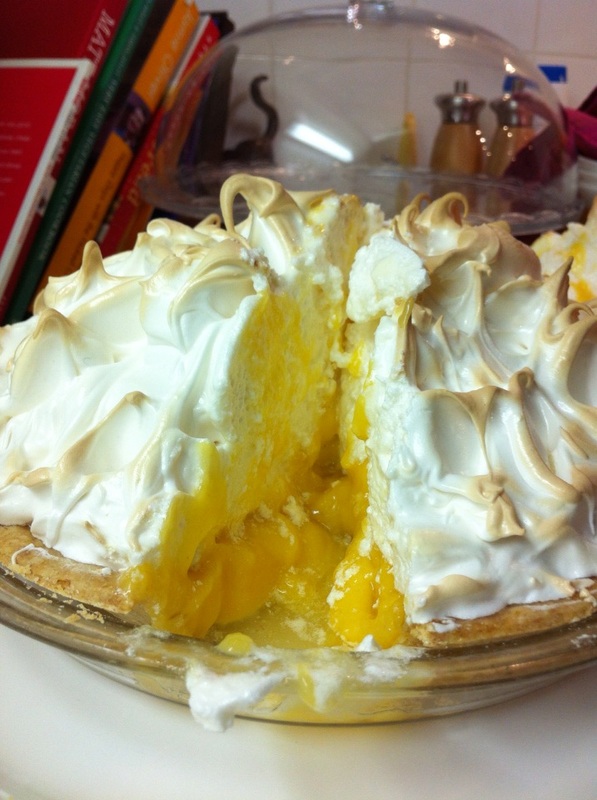
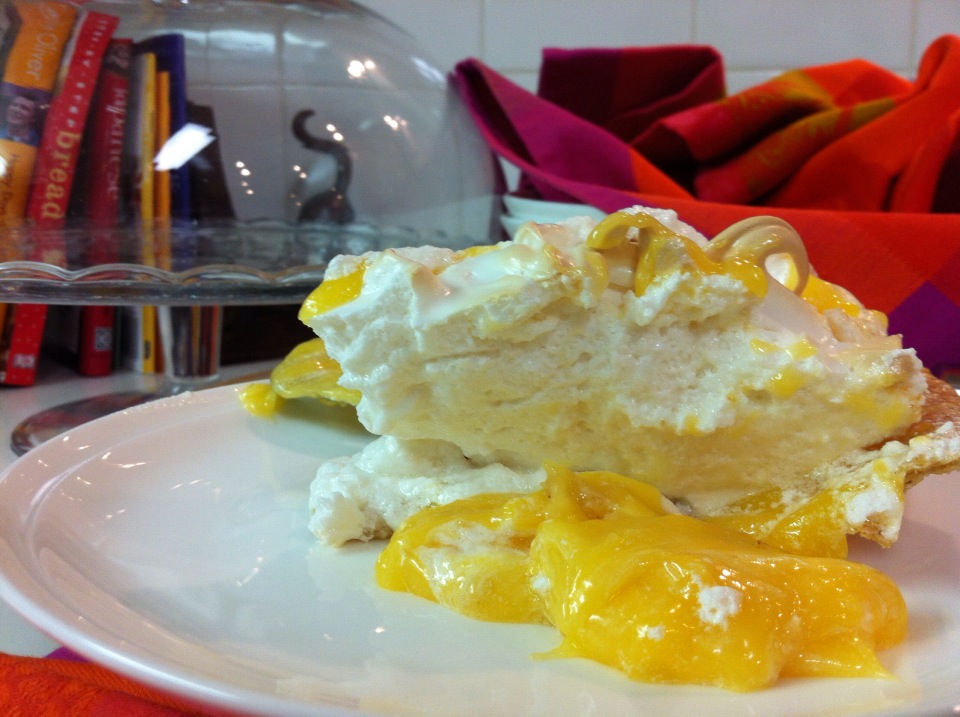
I didn't chill my pie after I'd cooked it, which was a mistake! I have super oozing curd that tastes great but has a mind if it's own! So excuse the photos that don't have layer definition, but do recognize the truth of the effort, haha. It's honest baking.
The meringue was the most successful element; fluffy, fluffy, fluffy. The crust I'd rolled too thin, and the curd.. well, that's been expanded on already.
I reckon these could've been made into small tarts. They might be easier to handle because no cut-and-serve is necessary. .. and you get your own individual tartlet :)
Enjoy! Ingredients:
Sweet Shortcrust Pastry:
- 250 g plain flour
- 1/4 tsp salt
- 2 tbsp caster sugar
- 125 g chilled butter, small cubes
- 2-3 tbsp iced water
Sift the flour and salt into a bowl. Add the chopped butter and rub it in with your fingertips until the mixture resembles fine breadcrumbs. Add the sugar and mix with your hands. Make a well in the centre and add nearly all the water. Grab a flat-bladed knife and in cutting motions bring the water and flour mixes together. They'll form small beads of dough while coming together. Only add more water, teaspoon by teaspoon, until the dough just holds together. When wet enough to hold together, gather it into a ball and wrap in cling film. Place in the fridge for 20-30 minutes.
Preheat your oven to 180˚ C (160˚C Fan)Grease a 25 cm wide, 3 cm deep pie dish. Once your pastry has chilled, roll it out on a lightly floured, clean surface bigger than the area of your pie dish. Using a rolling pin, roll the pastry around the pin and unroll over the pie dish, make sure the pastry fills the whole depth on the sides, and then, using a knife, trim down the edges of the pie by lifting the dish and vertically cutting away from you along the rim of the dish. Place the pastry in the fridge to chill for 20 minutes. Once chilled, line with baking paper and fill with rice or baking beads for weight. Place in oven for 15 minutes. When done, remove rice/ baking beads and baking paper, and place back in the oven for a further 15-20 minutes. Remove and cool. Increase your oven temperature to 200˚ C (180˚ Fan).
Grapefruit Filling:
- 30 g plain flour
- 30 g cornflour
- 250 g caster sugar
- 185 ml grapefruit juice
- the juice of one lemon
- 1 tbsp grapefruit and lemon zest
- 315 ml water
- 50 g unsalted butter, chopped
- 6 egg YOLKS (whites will be used for meringue)
Put the flours, sugars, grapefruit juice, lemon juice and zest in a pan. Gradually add the water while whisking over medium heat until smooth with no lumps. Use a wooden spoon to now stir the mixture on medium heat, cooking for 2 mins or until it becomes thick. Remove from the heat, grab your whisk, and vigorously whisk in the butter and egg yolks until combined. Return your pan to low heat and with your wooden spoon, stir the mixture constantly for 3 mins or until really thick. (This might take longer, but it should resemble a thick yoghurt consistency. It will have stopped flowing out to fill the whole pan.) Once this consistency is reached, remove from heat and set aside.
Meringue:
- 6 egg WHITES
- pinch of cream of tartar
- 340 g caster sugar
Place egg whites and cream of tartar into a clean, dry large bowl. Using an electric mixer, beat the eggs until soft peaks form and then gradually add the sugar while beating. The meringue should be thick and glossy, and non-grainy.
ASSEMBLING:
Spread your grapefruit filling into the cooled pie shell and cover with the meringue which should be heaped in the middle. Work around the edges to bring meringue and pastry together and to cover the filling from sight. Using a knife, create small peaks on the meringue for visual effect. Then, place in the oven for 8-10 minutes or until peaks have lightly browned. When done, leave to cool and then chill in the fridge to set the curd before cutting.
I was impatient and didn't refrigerate mine, so below is what happened. It's okay though, every element of it tasted amazing! It just needs some work... A little too gooey for my liking but the taste is there!
Ahh breakfast, the most important meal of the day! There is nothing better than waking up and making a nutrient packed smoothie to last me throughout the day.
There are so many ways to add extra nutrients into smoothies. If you are looking to add protein, add some protein powder. There are different flavors of protein powder that you can use too! I don't usually use protein powder but when I make my brother a smoothie I use the plain flavor or the vanilla flavor since they aren't super flavorful. Another option to make your smoothie more nutritious is to add spinach to it. It might sound weird, but spinach is really yummy in smoothies! The color is the only difference between a spinach smoothie and one made without spinach. Other than that the flavor is consistent through both of them.
I decided to kick off my day with a healthy fruit smoothie made with berries, bananas and coconut milk. I didn't add any protein powder because I don't like the additional texture it gives off. I also couldn't add any spinach because currently we are out, so it will have to wait until later. Anyways, in this smoothie I used frozen bananas, the frozen mixed berry mix from costco and vanilla flavored coconut milk. It tasted amazing! I didn't think I would be a fan of coconut milk because I don't like the coconut taste, but I couldn't taste it in this smoothie--which was nice.
Ingredients:
1. 1/2 frozen banana (It is better to use frozen banans instead of normal bananas because it allows the smoothie to be thicker, but you can use normal ones too)
2. 1 cup frozen mixed berries
3. 1 1/4 cup Sugar Free Vanilla Coconut Milk
How to make the smoothie:
1. In a blender, combine all the ingredients and blend on high until the ingredients are fully combined.
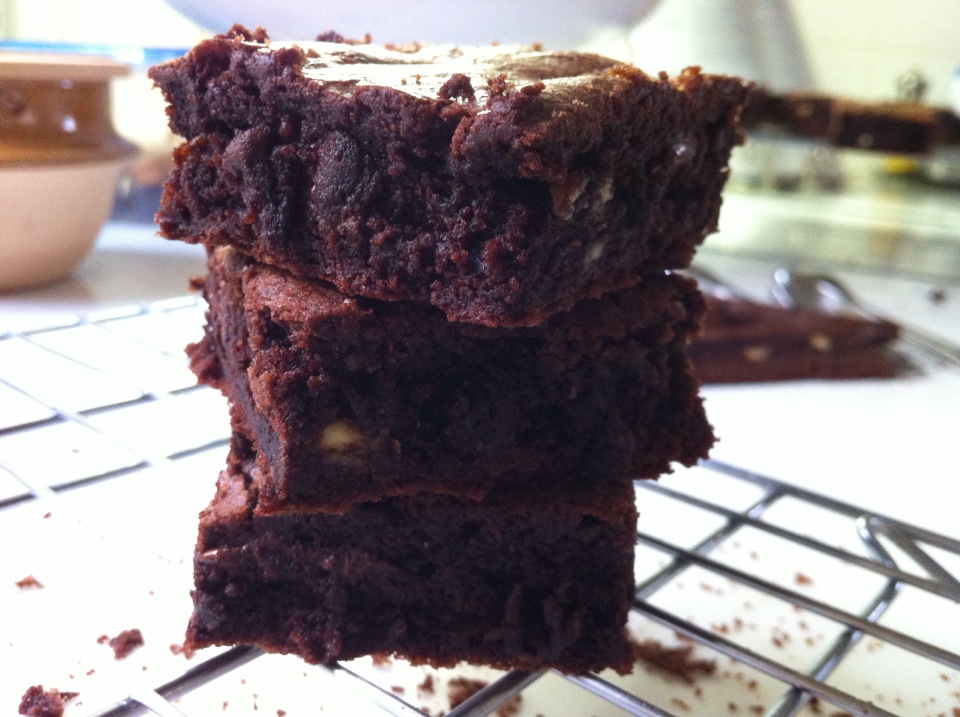
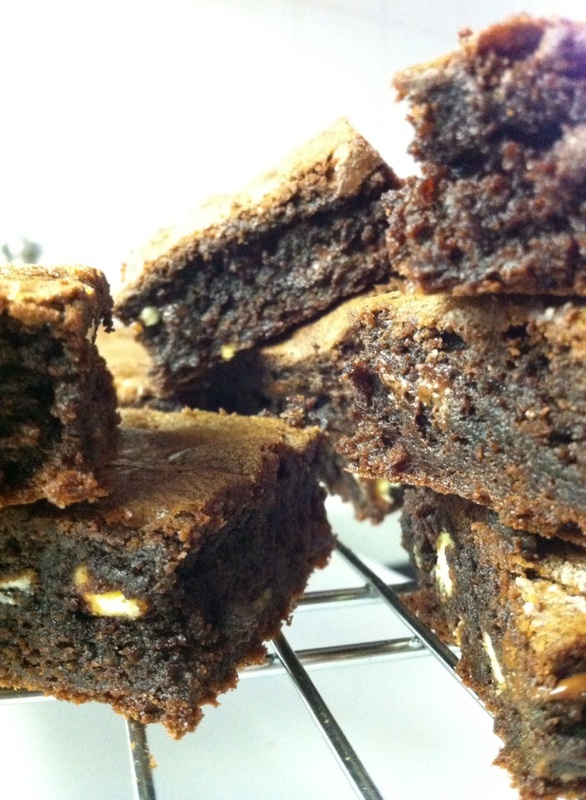
Brownies are beyond refusal. That moist, gooey consistency that they possess along with the rich chocolate marbling is sooo satisfying, and so delicious. There was absolutely no holding back with this recipe. I've made no healthy substitutions or anything; it's got all the good stuff going on. A genuine brownie.
Brownies don't require much effort to make. If you've got all the ingredients, it's just a matter of chucking them all in a bowl and mixing them together. And wow, the mixture is something on it's own. I tried to avoid getting a spoon involved but it's something that I cannot resist. (I feel sick now) The same goes for cake batters and cookie dough. I believe that if the batter tastes good, there'll be nothing wrong once it's cooked. So, basically, you HAVE to try the mixture before you cook it to ensure a good bake. (tehel; just save some for the oven)
My sister needed something baked for an event she has going on at school. I took up the opportunity and stepped into the kitchen....once again. I wasn't surprised at her request for brownies; they seem to be the most popular these days, and I'm not sure whether that's because they're super easy to make, or that they're simply, so. darn. tasty. Actually, they're also easier to transport, and can't be as messy as frosting on a cupcake. So, summed up, brownies seem to be a perfect sweet for events held away from home.
Ingredients:
- 275g softened butter
- 375g caster sugar
- 4 large eggs
- 75g cocoa powder
- 100g self-raising flour
- 50g white chocolate chips
- 50g dark chocolate chips
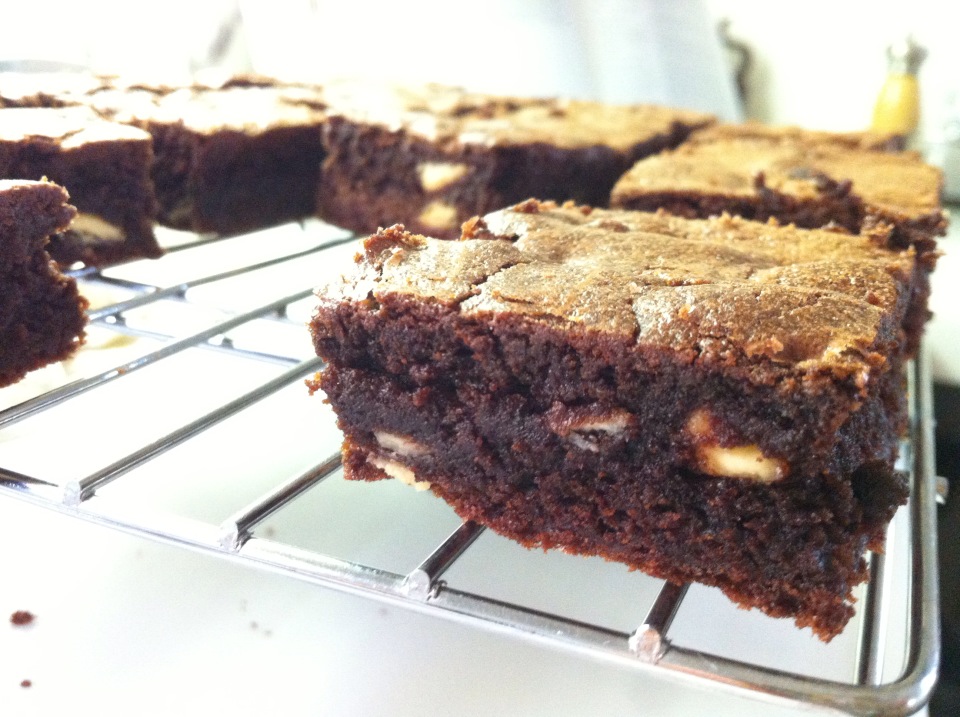
( I buy slabs of chocolate and smashed them up into pieces. I find the chocolate a lot tastier when done like this. White chocolate tends to taste like caramel once it's baked and is a great addition to brownies. Soft caramel or toffee can also be added to the batter before baking. The same can be done with pretty much anything... m&m's, peanut butter cups(minis), honeycomb, nuts, marshmallow etc...)
1) Preheat your oven to 180 degrees C/ 160 fan forced degrees C. Grease a 30x23 cm tray and line with baking paper.
2) Measure every ingredient into a medium sized bowl and beat until well combined, scraping down the sides of the bowl with a spatula midway through. Spoon the mixture into the prepared tray and smooth out with a spatula, evening out the surface as much as possible.
3) Bake in preheated oven for 35-40 minutes or until a crusty top has formed and a knife or skewer inserted into the center comes out clean. Once cooked, leave in tin for a few minutes before placing a wire rack over the top and flipping it onto it. Leave to cool for a further 10 minutes before flipping around again and cutting into neat little squares.
This is a pretty fail-proof recipe. :)
Yield: 24 delicious brownies
A nice treat to accompany a warm cup of tea.
I had a thin sheet of leftover vanilla sponge and i'm not a fan of wasting food. So, something had to be done! I simply cut the sheet into rectangles as pictured above, placed them in the oven at a low temperature and dried them out for 45 minutes or so. It only took some melted dark chocolate and a sprinkle of sea salt to jazz them up a bit, but not even that was needed.
I was surprised at how much these resembled boudoir biscuits. I love the crunchy texture, and the salt just...wow, goes so well with dark chocolate. It's such a versatile biscuit too.
Ingredients:
- 40g butter
- 3 large eggs
- 1 tsp vanilla extract
- 75g caster sugar
- 65g self-raising flour
- 1 tbsp cornflour
- 30g dark chocolate
- 1 tsp sea salt
1) Preheat the oven to 160 C fan forced, 180 C, 350 Fahrenheit. Grease a square tin and line the base with baking paper.
2) Gently melt the butter in the microwave. Set aside to cool slightly. Measure the eggs, sugar and vanilla into a bowl and beat at full speed until a mousse like consistency is reached. The mixture should be pale in colour and the beaters should leave a trail when lifted out of it.
3) Sift the flours into a bowl, and then gently fold half of this into the egg mixture. Drizzle half the melted butter around the outside of the mixture, and gently fold that in too. Repeat with the leftover flour and butter.
4) Pour the mixture into the prepared tin and bake for 35-40 minutes, or until the cake springs back nicely when lightly pressed with your finger. Leave to cool in the tin when done before lifting onto a wire rack. Once completely cooled, slice in half and then in the opposite direction to form rectangular biscuits.
5) Turn the oven down to 50 degrees fan forced. Place the cake slices onto an oven tray and put in oven for 45-50 minutes or until nicely brown and crunchy. Flip them around halfway through. When they're done, transfer the biscuits to a wire rack to cool.
6) Once cooled, melt about 30g of dark chocolate in the microwave. Add 2 tablespoons of cream and combine. Dip each biscuit in the melted chocolate and then lightly sprinkle with sea salt. There are so many options. :)
Voila. Serve with a cup of tea or coffee.
Caera again.
Well these were crazy fun to eat.
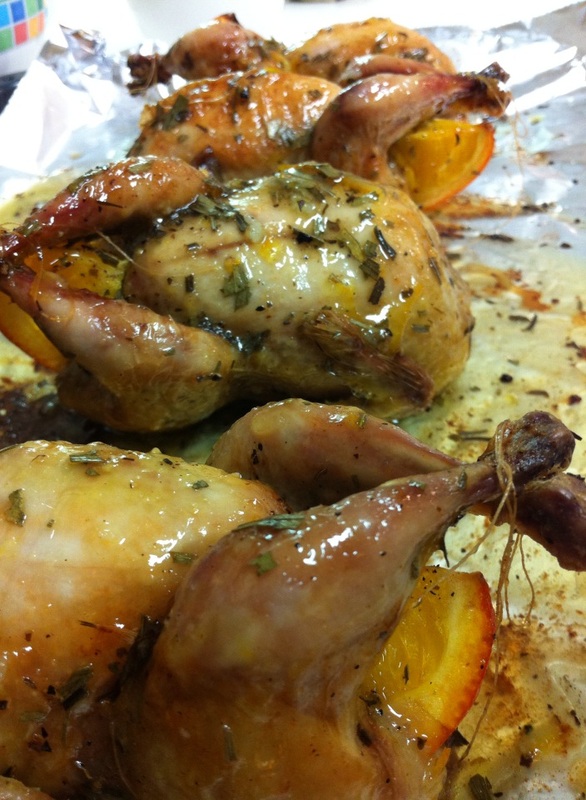
The thought of having my own little, individually roasted bird to pick at has always been something I've wanted to try. Even though I could totally polish off an entire chicken, a quail to me seemed to be the perfect size, if I was going to stick to proper portions....
This recipe is such a breeze. You buy the quail, stuff the quail, and then eat the quail. Honestly, the only technical thing is tying a piece of string around the legs.. and I assume you can tie your shoelaces, so I can assure you that this will not be an issue. If you can't tie your shoelaces... well, the string isn't even hugely necessary.
Quails are really small birds, so they don't need a lot of time to cook through. But, they also tend to be quite dry when cooked. Dryness can be avoided if you cook it until it's slightly pink at the bone, but not raw, and basting the bird with butter throughout it's cooking time really keeps the meat succulent and rich. Mine were almost spot on, which is a great thing if it's the first time you've cooked a quail; makes it that much more enjoyable!
The glaze that accompanies the quail is really delicious drizzled over the other elements on the plate. But with just the bird itself, over the crispy skin; so finger-licking good. And that's just the thing; you may start with a knife and fork, but you'll ultimately find yourself biting the meet of the carcass and pulling the meat away with your fingers. There is something satisfying about using your fingers with these kinds of meals. I absolutely encourage you to use your fingers, but have some napkins nearby.
|
Ingredients:
QUAIL
- 4 whole quail, cleaned and patted dry
- 4 tsp of butter
- 1 orange, cut into wedges
- 4 tsp tarragon
- salt and pepper
- clove of garlic (optional)
|
GLAZE
- 4 tbsp orange marmalade
- 2 tbsp fresh orange juice
- 1 garlic clove
- 1 tbsp tarragon
- salt and pepper
| Directions:
1) Preheat your oven to 180 C fan forced, 200 C, 350 Fahrenheit. Place a pinch of salt and pepper on the inside of each bird, making sure not to over-salt. Place 1 teaspoon of butter, a wedge of orange and pinch of tarragon into each bird. Slices of garlic are optional; only add a few.
2) Apply a coating of butter to the outside of each bird and sprinkle with some more salt and pepper ( the legs of the bird can be tied together and covered in foil to prevent burning).
3) Place on a foil lined tray, breast side up, and cook for 20-25 minutes, frequently checking on them. At least twice throughout the cooking time, baste each bird with melted butter. They should brown nicely on top.
4) In the meantime, the glaze can be prepared. In a microwaveable dish, place the marmalade, tarragon, orange juice and minced garlic clove, then combine. Heat this in the microwave until a smooth, runny syrup consistency is reached. You can do this in intervals to intensify the flavour.
5) When the quails are cooked, pull them out, coat them generously with the glaze, using maybe half, cover them, and then let them rest for a few minutes. Just before serving, pour the juice from the cooked quails into the leftover glaze, stir, and then drizzle over the quail.
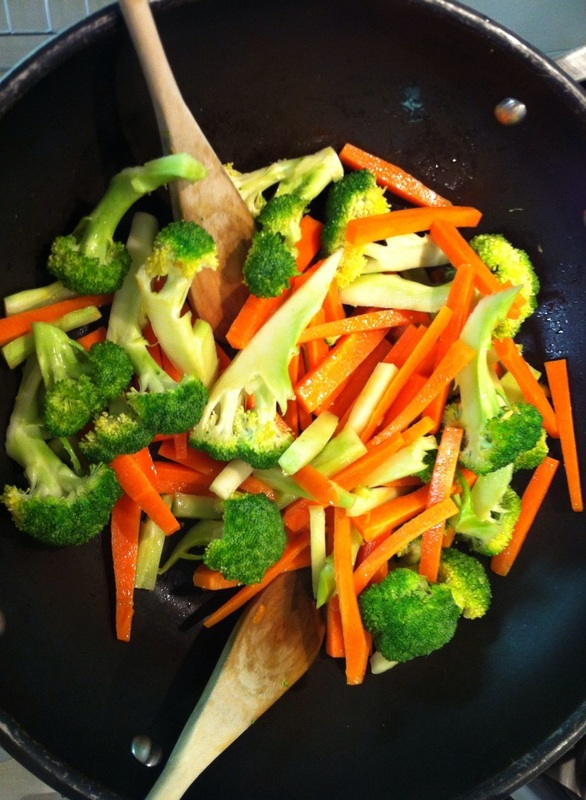
I served these succulent quails with some fresh wok-fried carrots, broccoli and zucchini and boiled short-grain brown rice that had been cooked in stock for added flavour. The flavours came together better than I thought they would. The quail was rich and succulent and the glaze added that syrupy citrus component that paired so well with it and brought it to life. We all really, really enjoyed this meal. I reckon I'll be making this again pretty soon.
|


 RSS Feed